A DIY privacy screen can transform your outdoor space into a secluded retreat. It’s an affordable, customizable solution for homeowners seeking solitude.
Creating a DIY privacy screen for your outdoor area is a practical project that enhances privacy and adds aesthetic appeal to your home. It’s a straightforward task that can be accomplished with various materials like wood, plants, or fabric, depending on your preference and the style of your outdoor space.
A well-designed privacy screen not only shields you from prying eyes but can also serve as a windbreak or a decorative feature that complements your garden or patio. By choosing the right materials and design, you can ensure your outdoor privacy screen is both functional and stylish, making it a valuable addition to your home.
Introduction To Diy Privacy Screens
Embrace the art of creating your own sanctuary with DIY privacy screens for your outdoor space. These clever structures provide a secluded retreat right in your backyard or patio. Perfect for those who enjoy the do-it-yourself approach, building a privacy screen can be a rewarding project that enhances your outdoor living experience.
Benefits Of Having A Privacy Screen
- Boosts privacy: Enjoy your outdoor space without worrying about prying eyes.
- Enhances aesthetics: Privacy screens can add style and character to your garden.
- Shields from elements: They offer protection from wind, sun, and noise.
- Defines areas: Screens can help separate different zones in your yard.
- Increases value: A well-designed screen can raise your property’s appeal.
Key Considerations Before You Start
- Measure your space: Ensure the screen fits perfectly in the intended area.
- Select materials: Choose durable materials suited for outdoor use.
- Design wisely: Think about the screen’s look and how it complements your home.
- Check regulations: Some areas require permits for outdoor structures.
- Plan for upkeep: Consider the maintenance your privacy screen will need.
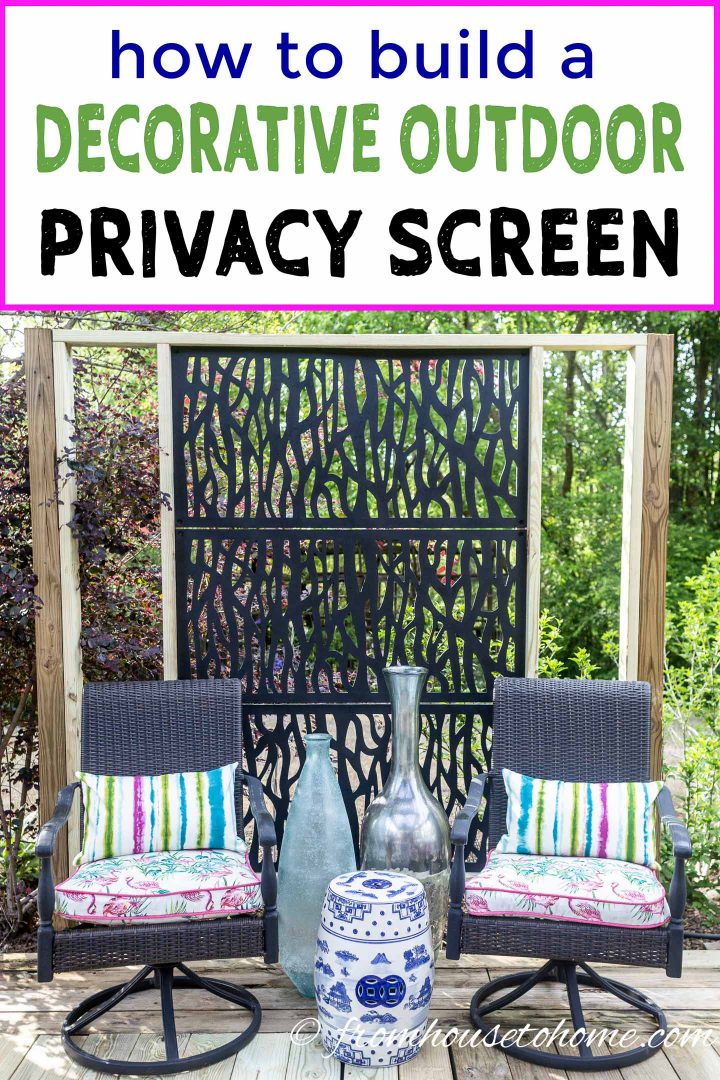
Credit: www.fromhousetohome.com
Choosing The Right Materials
Creating a DIY privacy screen outdoor calls for materials that stand the test of time. Weather resistance and eco-friendliness are key. Each material has its own benefits. Let’s explore the best options for your outdoor sanctuary.
Options For Weather-resistant Materials
Selecting materials that can endure rain, wind, and sun is crucial. Here’s a list of weather-resistant materials:
- Vinyl: Doesn’t rot, resists moisture
- Aluminum: Rust-proof, sturdy
- Treated Wood: Long-lasting with proper care
- Bamboo: Natural, tough
Each material comes with a unique look and feel. Consider your climate and the style you want to achieve.
Eco-friendly Choices
For the environmentally conscious, several materials fit the bill:
| Material | Pros |
|---|---|
| Reclaimed Wood | Recycles old wood, reduces waste |
| Bamboo | Grows fast, biodegradable |
| Recycled Plastic | Long life span, keeps plastic out of landfills |
These choices help protect the planet. They also offer durability for your privacy screen.
Design Ideas For Privacy Screens
Outdoor spaces are personal retreats. A well-designed privacy screen can transform your area into a secluded haven. It shields you from prying eyes. It blends style with function. Below are creative ideas to inspire your next DIY project.
Traditional Wooden Lattice
Wooden lattice screens bring a classic charm to gardens. They are versatile. Paint them to match your outdoor decor. Add vines for a natural touch. Here are ways to make wooden lattice screens stand out:
- Choose weather-resistant wood.
- Customize the lattice pattern size.
- Use a strong frame to support the lattice.
Modern Metal Panels
Metal panels offer a sleek, contemporary look. They are durable. They resist harsh weather. They come in various designs. Here’s how to incorporate metal panels:
- Select powder-coated panels for longevity.
- Install with gaps for airflow and light.
- Combine with wood for a warm and cool mix.
Living Walls With Climbing Plants
Living walls are a green solution. They use climbing plants to create a screen. They bring life to your space. They improve air quality. Consider these tips for a thriving living wall:
- Choose fast-growing climbers like ivy or jasmine.
- Set up a sturdy support structure.
- Ensure plants receive enough water and sunlight.
Tools And Supplies Needed
Embarking on a DIY privacy screen project transforms your outdoor space. A well-planned project requires the right tools and supplies. This ensures a smooth build process. Let’s dive into the essential toolkit for any DIY enthusiast, from basics to specialty items for those intricate designs.
Basic Tools For The Diyer
To start your privacy screen, gather these basic tools:
- Tape measure: Accurate measurements are crucial.
- Saw: A handsaw or circular saw cuts wood to size.
- Drill: For holes and screws, a power drill is a must.
- Level: Keep your screen straight and even.
- Screwdriver: For manual screwing, when precision is needed.
- Hammer: Essential for nails and adjustments.
- Safety gear: Gloves and goggles protect you.
Specialty Items For Advanced Projects
Advanced privacy screens might need more than just the basics:
- Staple gun: For attaching fabric or mesh.
- Wood finish: Protects your screen from the elements.
- Decorative hardware: Adds flair to your project.
- Post hole digger: For installing posts in the ground.
- Concrete mix: Secures posts for a sturdy build.
Step-by-step Construction Guide
Creating a DIY privacy screen for your outdoor space is a rewarding project. It enhances your garden’s privacy and aesthetic appeal. Follow our step-by-step construction guide to build your own. Each phase is straightforward. Let’s get started with the basics.
Preparing The Site
Choose the location for your privacy screen carefully. Ensure it’s level and accessible. Clear the area of debris and mark the positions for the support posts. Use a post-hole digger for creating holes that are deep enough to hold the posts securely.
- Measure the area for the screen.
- Remove any obstacles that might interfere with construction.
- Dig post holes approximately 24 inches deep.
Assembling The Frame
The frame is the backbone of your privacy screen. Start by cutting the wood to the required lengths. Use weather-resistant lumber for durability. Assemble the frame on a flat surface before erecting it.
- Cut the vertical and horizontal pieces.
- Assemble using corner brackets or screws.
- Ensure the frame is square and level.
Attaching The Screen Material
Now it’s time to attach the screen material. This could be wooden slats, lattice, or fabric. If you’re using wood, stain or seal it before attaching to protect against weather.
| Material | Tools Needed | Steps |
|---|---|---|
| Wooden Slats | Screwdriver, Screws | Align slats and screw into frame. |
| Lattice | Staple Gun, Staples | Staple securely along the frame’s edges. |
| Fabric | Grommets, Ropes | Attach grommets and tie to the frame. |
With these steps, you can craft a sturdy and stylish privacy screen that suits your outdoor space perfectly. Enjoy your new, private retreat!
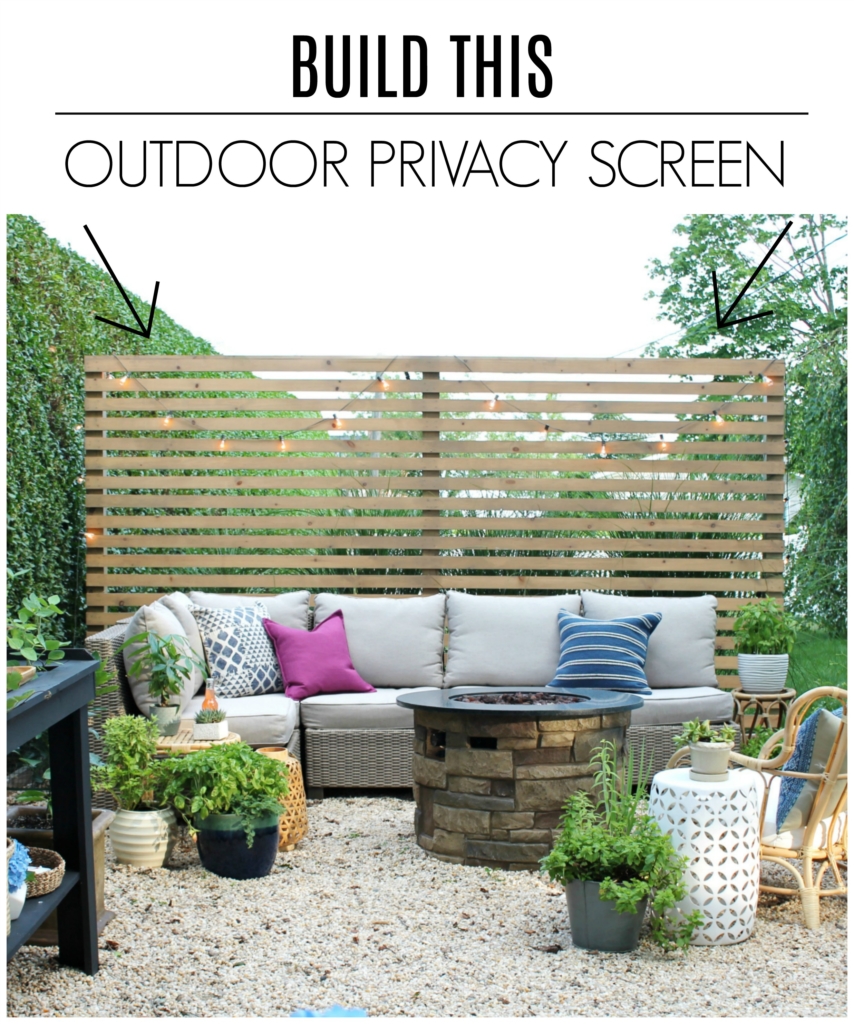
Credit: cityfarmhouse.com
Decorating Your Privacy Screen
Your outdoor privacy screen serves more than one purpose. It shields you from prying eyes, but it also offers a canvas for personal expression. Decorating your screen turns a simple divider into a focal point of your garden or patio. Let’s explore creative ways to embellish your privacy screen, making it both functional and stylish.
Incorporating Lighting
Lights can transform your privacy screen into a twinkling backdrop for evening gatherings. Consider these options:
- Fairy Lights: Drape them for a magical glow.
- Solar Lights: Eco-friendly and cost-effective.
- Lanterns: Hang them for a traditional touch.
Choose lights that match your style and the mood you want to create.
Adding Decorative Elements
Embellish your screen with elements that reflect your personality. Here’s how:
| Element | Idea |
|---|---|
| Plants | Attach planters for greenery. |
| Art | Hang weatherproof art pieces. |
| Mirrors | Add mirrors for depth and light. |
Choose decorations that are outdoor-friendly and durable.
Maintenance Tips
Maintaining your DIY privacy screen ensures it lasts longer and stays beautiful. Follow these simple tips to keep your screen in great shape all year round.
Routine Cleaning And Care
Regular cleaning is essential. Dirt and debris can damage your screen over time. Use these steps for effective cleaning:
- Gently brush off loose dirt with a soft brush.
- Wash the screen with a mild soap and water solution.
- Rinse with clean water to remove any soap residue.
- Allow the screen to air dry completely before reassembling.
Inspect your screen monthly. Look for any signs of wear or damage. Small issues can turn into big problems if ignored.
Seasonal Adjustments And Repairs
Changes in weather can affect your privacy screen. Keep your screen functional and attractive with these steps:
- Before winter, ensure all fasteners are tight.
- Check for any cracks or damage and repair them promptly.
- Apply a water-repellent coating if your screen is made of wood.
- During spring, refresh the paint or stain if needed.
By following these maintenance tips, your DIY privacy screen will stand strong and look great, no matter the season!
Real-life Examples
Creating a DIY privacy screen can transform outdoor spaces. Let’s explore two real-life examples where such projects made a huge difference.
Case Study: Urban Balcony
A compact urban balcony can also enjoy privacy and style. Sam from Chicago wanted to enjoy his morning coffee without the busy street view. He chose a lightweight bamboo screen for its ease and aesthetics.
- Bamboo panels were easy to install.
- They provided a natural, calming effect.
- Sam can now enjoy privacy and peace.
Before and after photos show a stunning transformation. The balcony feels larger and more inviting.
Case Study: Suburban Backyard
Emma in Florida wanted a private backyard space for her family. She opted for a taller, wooden privacy screen around her patio.
- Wood slats were stained to match her deck.
- Installation took a weekend with help from friends.
- The screen added both privacy and value to her home.
Emma’s backyard is now a favorite gathering spot for BBQs and family events. The wooden screen blends seamlessly with the garden, enhancing the outdoor decor.
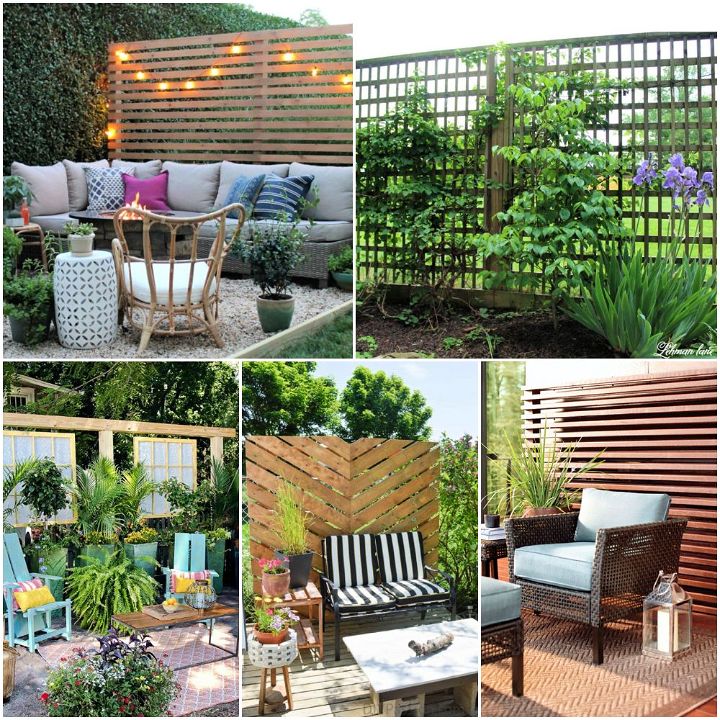
Credit: www.lostateminor.com
Frequently Asked Questions
How To Make Your Own Outdoor Privacy Screen?
Choose a design and gather materials like wood slats, screws, and stain. Measure your space, cut the wood to size, and assemble the frame. Attach the slats, ensuring even spacing for privacy. Finish with a weather-resistant stain or paint, then install your screen securely in your outdoor area.
What Is The Best Material For An Outdoor Privacy Screen?
The best material for an outdoor privacy screen is typically weather-resistant wood, like cedar or redwood, or composite materials for durability and low maintenance.
What Wood To Use For A Privacy Screen?
For a privacy screen, consider using cedar, redwood, or pressure-treated pine for their durability and resistance to decay. These woods also offer a natural aesthetic that blends with outdoor environments.
How Do You Secure A Freestanding Privacy Screen?
Anchor your freestanding privacy screen to the ground using stakes or heavy bases. Secure it to a solid structure, like a fence or wall, for added stability. Use outdoor-rated brackets and hardware resistant to weather conditions. Regularly check and tighten any loose fittings to maintain screen security.
Conclusion
Crafting your own outdoor privacy screen is a rewarding project. It enhances your garden’s beauty while ensuring seclusion. With creativity and basic tools, you’ve learned how to create a functional, stylish barrier. Embrace the outdoors anew, enjoying your personal, peaceful retreat.
Start building your sanctuary today.